Building a camper van cooling system is a critical step in any DIY conversion, especially if you plan to travel in hot climates or during summer months. Without proper ventilation and temperature control, your van can quickly become an oven, making long trips uncomfortable and unsafe. This article explores practical, budget-friendly ideas to create an efficient camper van cooling system, from solar-powered air conditioners to DIY evaporative coolers and insulation hacks. Whether you’re a first-time builder or refining your setup, these solutions prioritize airflow, energy efficiency, and durability—ensuring your van stays cool no matter where the road takes you. Let’s dive into the details.
Understanding Camper Van Cooling System Types
When designing a camper van cooling system, DIYers must choose between passive and active approaches, each with distinct trade-offs. Passive systems rely on natural airflow, insulation, and thermal mass to regulate temperature. These systems are ideal for mild climates or short trips, as they require no electricity or moving parts. Common components include reflective insulation, roof vents, and thermal curtains. Pros include low cost, minimal maintenance, and compatibility with off-grid setups. Cons? Limited effectiveness in extreme heat or humidity, and reliance on strategic design to prevent heat buildup.
- Passive Cooling Tips: Use materials like closed-cell foam for insulation, install roof vents to channel hot air out, and line walls with reflective barriers to reduce heat absorption.
- Active Cooling Options: These systems use fans, air conditioners, or refrigerants to force airflow or remove heat. Examples include DC-powered fans, portable AC units, or mini-split systems. Pros: superior cooling in harsh conditions, adjustable temperature control. Cons: higher upfront cost, power consumption (requires solar panels or batteries), and potential mechanical failures.
- Hybrid Considerations: Many DIYers combine passive and active methods—for example, using insulation to reduce load on a small AC unit. This balances cost, efficiency, and reliability.
Choose based on your climate, budget, and power availability. In arid regions, passive systems may suffice; in tropical zones, active cooling is often essential. Always calculate heat gain from sunlight exposure and insulation R-values to avoid over- or under-engineering your setup.
DIY Ventilation Solutions for Efficient Cooling
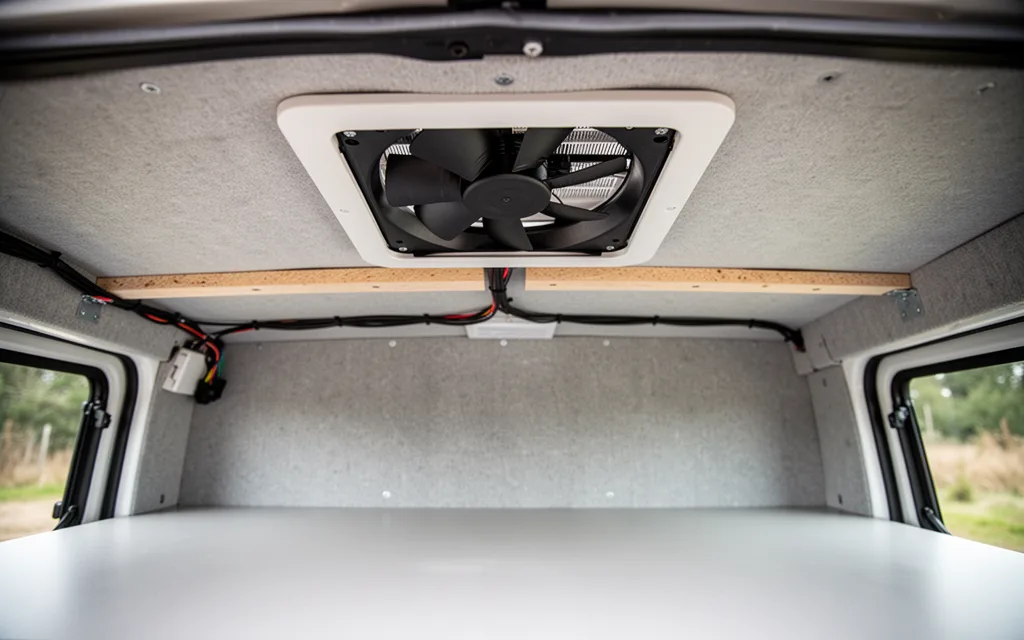
Proper ventilation is critical for maintaining airflow and reducing heat buildup in a van conversion. Start with roof vents: measure your van’s roof to select a vent that fits, then cut a hole using a jigsaw or hole saw. Secure the vent with screws, ensuring it’s level, and seal gaps with silicone caulk to prevent leaks. For powered vents, install a low-voltage fan (e.g., Amazon’s options) and route wiring through the roof’s insulation to avoid moisture damage.
Next, install window fans: use a universal window mount kit to secure a fan in a side or rear window. Ensure the fan is angled to draw air inward or push it outward, depending on your airflow needs. Pair with a fan controller (like a thermostat switch) to automate operation.
For ducting systems, use insulated flexible ducting to connect roof vents to interior spaces. Route ducts through ceiling or wall cavities, securing them with duct tape or clamps. Add a box fan to the duct’s end for forced exhaust, and use a remote control to adjust airflow. Test all components with a smoke pencil to identify leaks before sealing permanently.
Combine these methods for cross-ventilation: intake via window fans, exhaust through roof vents, and ducting to redirect airflow. Prioritize airtight seals and insulated materials to minimize heat gain during hot weather.
“|”
Thermal Insulation Techniques for Temperature Control
Effective thermal insulation starts with sealing gaps and using materials that block heat transfer. Spray foam is ideal for filling irregular spaces in walls, floors, and ceilings, creating an airtight barrier that prevents warm air from entering and cold air from escaping. Choose closed-cell spray foam for higher R-values (thermal resistance) and moisture resistance, especially in humid climates. Apply it in thin layers to avoid over-expansion, and allow full curing before adding interior finishes.
- Reflective insulation (e.g., bubble wrap or radiant barriers) should be installed on ceilings and roof interiors. Its reflective surface bounces radiant heat away, reducing summer heat gain. Pair it with a layer of fiberglass or foam for maximum effectiveness.
- Use insulated wall panels with foam cores for quick, DIY-friendly coverage. These can be cut to fit and mounted with adhesive or screws, minimizing labor.
- Seal all seams and joints with caulk or weatherstripping to prevent thermal bridging. Even small gaps can compromise insulation performance.
For best results, combine spray foam with reflective insulation in layered systems. This approach minimizes both conductive and radiant heat transfer. If you’re focusing on cooling, check out cool van conversion ideas for complementary strategies like vent placement and shade solutions.
Power-Saving Cooling System Ideas for Van Conversions
For off-grid van conversions, prioritize low-energy solutions that minimize power draw without sacrificing comfort. Solar-powered fans are a top choice—mount them on roof vents or near windows to circulate air using only sunlight. Opt for models with adjustable speed settings to balance airflow and energy use. Pair them with strategically placed intake vents to create a passive cooling loop, reducing reliance on electricity. Evaporative cooling units, which use water evaporation to lower temperatures, are another efficient option. These systems require minimal power to operate the pump and fan, making them ideal for dry climates. Install a small water reservoir and ensure proper airflow through the unit for maximum effectiveness. For added efficiency, use reflective window films and thermal curtains to block heat gain during the day, reducing the need for active cooling. If you’re exploring advanced options, consult camper van cooling options for a deeper dive into system compatibility and setup. Always size components based on your van’s interior volume and insulation quality—overkill systems waste energy. Lastly, consider smart thermostats that activate cooling only when temperatures exceed a set threshold, preserving battery life during long trips.
- Mount solar fans on roof vents for continuous, low-power airflow.
- Use evaporative coolers with manual water refill in arid regions.
- Install thermal curtains and reflective films to preclude heat buildup.
- Pair cooling systems with smart thermostats for automated, energy-efficient operation.
Troubleshooting Common Camper Van Cooling System Issues
Identifying and resolving cooling system issues requires methodical checks. Start by inspecting airflow pathways: use a flashlight to scan ducts, vents, and roof hatches for debris or obstructions. Blockages often occur near intake grilles or behind furniture; clear them with a vacuum or brush. If airflow feels weak, test the fan’s speed and direction—reversed blades or worn bearings can reduce efficiency. Replace the fan if it emits unusual noises or fails to spin under load.
- Airflow blockages: Check for insulation compression near vents, which can restrict airflow. Use a smoke test (e.g., incense) to trace air movement and locate leaks.
- Fan failures: Test the fan motor with a multimeter to confirm power delivery. If the motor runs but the fan doesn’t, disassemble the unit to inspect for seized bearings or damaged blades. Replace the fan if repairs are too complex.
- Insulation gaps: Inspect walls and ceilings for gaps around electrical outlets, plumbing, or seams. Seal these with expanding foam or weatherstripping. For hard-to-reach areas, use a thermal camera to detect cold spots indicating poor insulation.
- Condensation issues: Check for water pooling near the AC unit or ceiling. Install a condensate drain pan and ensure the unit is level to prevent leaks.
Document each step and prioritize fixes based on severity—prioritize insulation gaps if humidity rises, or fan repairs if cooling capacity drops. Regular maintenance, like cleaning filters monthly, can prevent many issues.
Leave a Reply