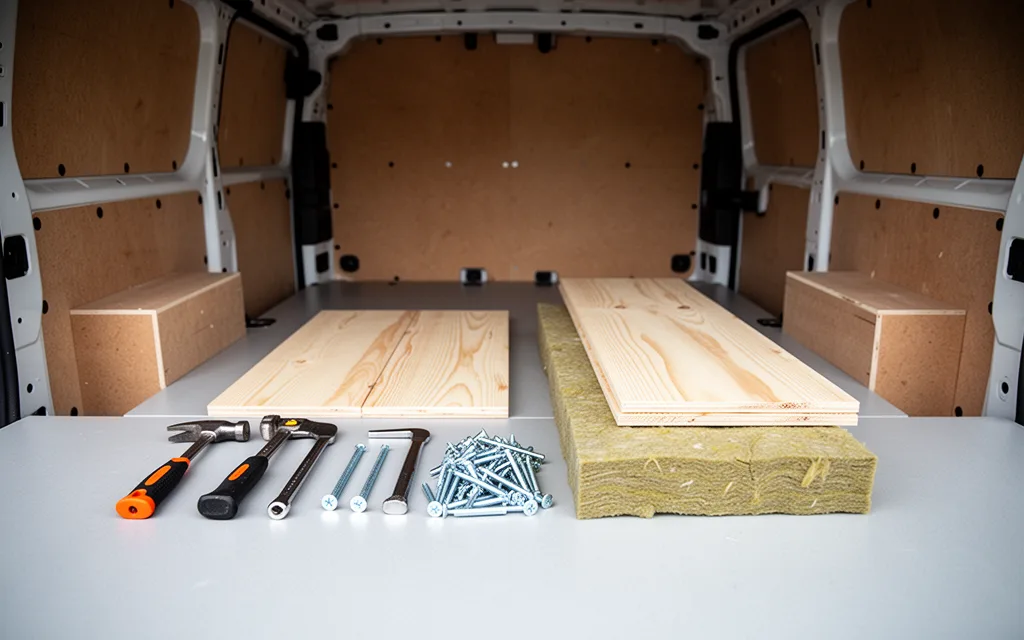
Whether you’re a seasoned traveler or new to van life, a simple camper van conversion kit can transform your vehicle into a functional, off-grid haven with minimal effort. Designed for campers and outdoor enthusiasts who value efficiency, these kits eliminate the guesswork of DIY conversions by providing pre-engineered components—think lightweight sleeping pods, foldable tables, and weatherproof storage solutions. No welding or carpentry skills required, they prioritize ease of installation and durability, ensuring you spend less time building and more time exploring. From compact layouts for solo adventurers to family-friendly setups, these kits cater to diverse needs, proving that comfort and adventure don’t have to be mutually exclusive.
Understanding the Basics of a Simple Camper Van Conversion Kit
A simple camper van conversion kit is a pre-assembled set of components designed to transform a standard van into a functional living space with minimal effort. These kits typically include essentials like fold-out sleeping platforms, lightweight storage solutions, and basic insulation materials. They are tailored for beginners who want to avoid the complexity of custom builds while ensuring core needs—such as comfort, storage, and weather protection—are met. Unlike full-scale conversions, which require advanced carpentry or electrical work, simple kits prioritize ease of installation and affordability, often using modular, plug-and-play designs.
- Key components: Pre-cut panels for walls and ceilings, foam insulation, vinyl flooring, and compact furniture like foldable tables or bunks.
- Purpose: To provide a foundation for camping without requiring specialized skills. Kits often include instructions for mounting systems, electrical wiring for lights, and ventilation solutions.
- Target use: Ideal for short-term trips or first-time converters. They avoid overcomplicating layouts, focusing on essentials like sleeping areas, storage, and basic kitchen setups (e.g., portable cooktops or sink kits).
- Cost-effectiveness: Kits reduce material waste and labor time, making them a budget-friendly alternative to sourcing parts individually.
These kits are not meant for long-term, off-grid living but serve as a starting point for those testing the waters of van life. They emphasize adaptability, allowing users to upgrade later with additional modules or custom builds. For example, a simple kit might include a single sleeping platform, while a more advanced version could add a small kitchenette. The goal is to balance practicality with simplicity, ensuring new converts can focus on the adventure rather than the build.
Top 5 Simple Camper Van Conversion Kits for 2024
For those seeking minimal hassle and maximum functionality, these kits streamline the conversion process with pre-engineered components. Prioritize kits that balance durability, weight management, and ease of installation.
- EcoCamp Solar Pod: Integrates 12V LED lighting, a foldable table, and a 200L freshwater tank. Pre-drilled mounting points and tool-free assembly make it ideal for first-time converters. Learn more here.
- VanLease Modular System: Features interlocking panels for walls and floors, reducing waste during installation. Includes a composting toilet and insulation rated R-10 for cold climates.
- Outdoorsy QuickFit Kit: Offers a 400W solar panel setup and a lightweight aluminum frame. Compatible with most van models; includes a 12V fridge and USB charging ports.
- Thule Overland Basecamp: Focuses on storage efficiency with roof-mounted cargo pods and a retractable awning. Includes a 220V inverter for appliances, though heavier than other kits.
- Wanderlust LitePack: Budget-friendly option with a 150L water tank, 12V battery, and a
Step-by-Step Guide to Installing a Simple Conversion Kit
Begin by clearing the van’s interior of all furniture and securing loose components. Gather your tools—drill, screwdriver, level, and measuring tape—and ensure the kit includes all necessary hardware. If your kit includes a subfloor or wall panels, start by removing existing seats or flooring to create a flat surface. Use brackets or adhesive to attach the subfloor, ensuring it’s level and secured to the van’s frame for stability.
Advertisement300 × 250Ad space- Install base structure: Mount wall panels or cabinets first, starting from the rear of the van and working forward. Use a level to prevent warping.
- Electrical setup: Run wiring for lights, outlets, and appliances along the van’s ceiling or walls. Connect to the battery system, ensuring proper fusing and grounding.
- Plumbing (if included): Attach freshwater tanks and waste systems to the van’s frame. Route hoses and secure with clamps to prevent leaks.
- Finish with insulation: Add foam or fiberglass insulation to walls and floors for temperature control, then cover with drywall or paneling.
For customizing layouts or storage, refer to our simple van conversion ideas guide for inspiration. Once all components are installed, test electrical and plumbing systems for functionality. Finally, add interior finishes like flooring, paint, or curtains to personalize your space. This method ensures a functional, durable setup without requiring advanced carpentry skills.
Material Comparison: Choosing the Right Components
Selecting the right materials for your camper van conversion kit balances durability, weight, and budget. For example, Simple Van Conversion Kits for DIY Enthusiasts often include lightweight aluminum frames, which resist corrosion and reduce overall weight—critical for fuel efficiency and handling. However, aluminum can be pricier and less rigid than alternatives. Steel, while stronger and more affordable, adds significant weight and requires regular maintenance to prevent rust, making it less ideal for frequent off-grid use. Wood, commonly used for interior panels, offers warmth and ease of customization but lacks the structural integrity of metal, necessitating additional reinforcement. Composite materials, like fiberglass or carbon fiber, combine strength and lightness but are typically reserved for high-end kits due to their cost. For electrical components, waterproof polycarbonate is essential for solar panel enclosures, as it withstands UV exposure and extreme temperatures. When choosing, consider your climate: coastal areas demand corrosion-resistant options, while arid regions prioritize heat tolerance. Always weigh the trade-offs between upfront cost and long-term maintenance. A well-chosen material kit not only enhances your van’s functionality but also ensures it withstands the rigors of outdoor living without compromising comfort.
- Aluminum: Lightweight, corrosion-resistant, but expensive and less rigid.
- Steel: Durable and affordable, but heavy and prone to rust.
- Wood: Aesthetic and easy to work with, but requires reinforcement.
- Composites: Strong and light, but costly and niche.
- Polycarbonate: Ideal for electrical enclosures due to UV and temperature resistance.
Customization Tips for Personalizing Your Kit
Personalizing your camper van kit starts with identifying your core needs and aesthetic preferences. Begin by assessing how you’ll use the space—will it serve as a weekend getaway, a full-time home, or a base for outdoor adventures? This determines priorities, like storage capacity or energy efficiency. Next, consider materials: opt for lightweight, durable options (e.g., aluminum for countertops or recycled fabric for upholstery) to balance practicality with style. For a minimalist vibe, stick to neutral tones and streamlined furniture; for a bohemian feel, add textured rugs, macramé wall hangings, or bold color accents.
- Modular storage: Use adjustable shelving, collapsible bins, or magnetic tool strips to adapt the interior to your gear without sacrificing space.
- Lighting hacks: Install LED strips under cabinets or along ceiling edges for ambient lighting, and choose solar-powered lanterns for energy independence.
- Functional upgrades: Add a fold-out kitchen counter, a retractable shower curtain, or a portable camping table that doubles as a work surface.
- Personalized touches: Incorporate DIY elements like hand-painted wall art, custom bedding with outdoor motifs, or a small herb garden on a windowsill.
- Power solutions: Integrate USB ports, a portable battery pack, or a compact inverter to charge devices without relying on external sources.
Test layouts in a small space before finalizing choices, and prioritize components that enhance both comfort and utility. Small adjustments—like adding a magnetic knife strip or a hanging laundry line—can transform a basic kit into a space that feels uniquely yours.
Related reading
Leave a Reply