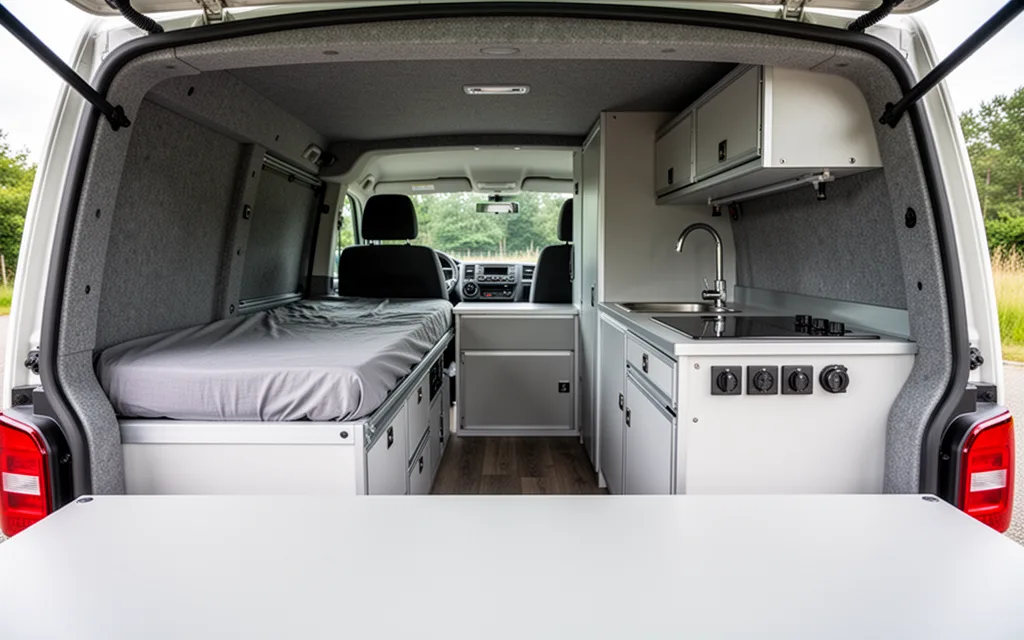
If you’re new to van life or just starting your DIY journey, “simple van conversion ideas” can transform your vehicle into a functional, comfortable home without overwhelming complexity. Focus on essentials like lightweight sleeping setups, modular storage, and easy-to-install lighting to keep costs low and progress manageable. Prioritize ventilation, electrical upgrades, and space-saving furniture to maximize usability. Avoid overcomplicating layouts or investing in high-end materials early on—stick to adaptable solutions that grow with your needs. With patience and smart planning, even beginners can achieve a personalized, efficient living space that balances practicality and creativity.
Essential Tools and Materials for Simple Van Conversions
Before diving into van conversion projects, gather tools and materials that balance affordability with functionality. Start with a basic toolkit: a set of screwdrivers (both flathead and Phillips), a measuring tape, a adjustable wrench, pliers, a utility knife, and a level. These will handle most tasks, from securing cabinets to aligning shelves. A cordless drill with assorted bits is also invaluable for drilling holes or driving screws in tight spaces. For insulation, opt for affordable options like 1/2-inch rigid foam board (available at hardware stores for under $1 per square foot) or fiberglass batts, which provide thermal protection without breaking the budget. Seal gaps with weatherstripping or caulk to prevent drafts.
- Tools: Screwdrivers, measuring tape, wrench, pliers, utility knife, level, cordless drill, staple gun (for securing insulation).
- Materials: Foam board or fiberglass insulation, drywall or plywood for walls, screws/nails, 3M adhesive for lightweight fixtures, LED lighting strips, and a portable power strip for electrical setups.
- Extras: A ladder for reaching high areas, safety gear (gloves, goggles), and a small vacuum for cleaning dust after cutting or drilling.
Focus on versatility—tools like a multi-tool or a portable air compressor can handle multiple tasks. For materials, prioritize items that are easy to cut, install, and replace. Avoid overcomplicating your setup; beginners should aim for simplicity to stay within budget and avoid frustration. Always measure twice before cutting, and keep spare screws and adhesive on hand for unexpected fixes.
Step-by-Step Guide to Basic Van Modifications
Start by sketching a layout that prioritizes functionality and safety. Measure your van’s interior to determine where shelves, lighting, and storage will fit without obstructing critical areas like the driver’s seat or emergency exits. Use a ruler and graph paper to draft a rough plan, ensuring weight distribution remains balanced (avoid overloading one side). Once satisfied, gather materials like 1×4 lumber, brackets, and LED strips. Always wear gloves and eye protection when cutting or drilling.
- Install lighting: Mount LED strip lights under cabinets or along the ceiling using adhesive-backed tape or brackets. For overhead lighting, use puck lights or a small recessed light fixture. Connect wiring to a battery-powered inverter or hardwire into the van’s electrical system (consult a professional if unsure). A VanLife guide offers wiring diagrams for DIYers.
- Build shelves: Cut 1×4 boards to fit your van’s width and height. Use L-brackets to secure shelves to the walls or ceiling, ensuring they’re level. For a temporary solution, use Command strips or Velcro mounts. Avoid using screws in areas near the van’s frame to prevent damage.
- Optimize storage: Install overhead bins or hanging organizers for small items. Use vacuum-sealed bags for seasonal gear to save space. For under-floor storage, remove floor panels (if possible) and add dividers to keep items organized and prevent shifting during travel.
Test all modifications for stability and adjust as needed. Prioritize lightweight materials and avoid overcomplicating the layout—simple, accessible designs work best for beginners.
Cost-Effective Solutions for Budget-Friendly Conversions
Beginners can achieve impressive results without breaking the bank by repurposing materials and embracing secondhand finds. Start by salvaging items from thrift stores, garage sales, or even free community postings—old doors can become sturdy tables, and pallets can be transformed into storage units. For insulation, use recycled materials like old blankets or foam scraps, which provide thermal benefits without the price tag of commercial products. Avoid costly tools by using hand saws, hammers, and basic hardware, focusing on simplicity. A simple van conversion ideas guide can help identify projects that prioritize function over flash, such as using tension rods for closet dividers or repurposing camping gear as temporary fixtures.
- Repurpose furniture: Convert old sofas into sleeping areas by adding foam padding and a fitted sheet; use broken chairs as storage with added bins.
- Thrift-store treasures: Hunt for affordable lighting fixtures, rugs, or cabinets that match your van’s aesthetic without spending on new items.
- Free materials: Scour construction sites for scrap wood or ask local businesses for discarded packaging materials for insulation or wall panels.
- DIY window treatments: Use old curtains or fabric scraps to create blackout shades, reducing glare and improving energy efficiency.
By focusing on creativity and resourcefulness, first-time converters can build a functional, personalized space while keeping expenses low.
/xhtml
Common Mistakes to Avoid in Simple Van Conversions
Beginners often rush into van conversions without considering long-term usability, leading to avoidable issues. One frequent error is improper insulation installation—cutting corners here can result in uncomfortable temperatures and higher energy costs. Always prioritize sealing gaps and using materials like closed-cell foam or spray insulation for durability. Another pitfall is overcomplicating layout designs; excessive furniture or awkwardly placed fixtures can reduce space efficiency and make daily tasks cumbersome. Stick to minimalist, functional layouts that prioritize movement and storage.
- Ignoring weight distribution: Improperly balancing weight can compromise handling and safety. Place heavy items low and centered in the van.
- Using low-quality materials: Cheap countertops or flooring may degrade quickly. Invest in moisture-resistant, lightweight options for longevity.
- Overlooking ventilation: Poor airflow can lead to mold and musty odors. Install vents or use exhaust fans in kitchens and bathrooms.
- Underestimating electrical needs: Plan for adequate power outlets and lighting upfront. Refer to Simple Van Conversion Kits for DIY Enthusiasts for pre-tested electrical components that simplify setup.
- Skipping test runs: After installation, take short trips to identify leaks, electrical faults, or layout flaws before finalizing the build.
By addressing these issues early, you’ll save time, money, and frustration down the line. Focus on balance between simplicity and practicality to create a van that’s both functional and comfortable.
Simple Van Conversion Ideas for Different Living Needs
Whether you’re chasing minimalist travel, full-time nomad life, or weekend escapes, tailoring your van’s layout to your habits ensures comfort and efficiency. For camping-focused conversions, prioritize lightweight, collapsible furniture—think foldable tables, wall-mounted sleeping pods, and a portable kitchen setup with a compact stove and foldable sink. Solar panels and a composting toilet add off-grid functionality without permanent installations.
For full-time living, focus on durability and storage. Install a fixed bed frame with a mattress that doubles as a seat during the day, and use vertical space with overhead cabinets or hanging organizers. A small, energy-efficient fridge and a compact shower system (like a handheld hose with a portable tray) make long-term living feasible. Insulate walls with spray foam or rigid foam boards to maintain temperature control in extreme weather.
If you’re converting for weekend getaways, balance portability with comfort. A pull-out sofa bed, a mini-fridge, and a foldable dining table create a cozy space for short trips. Use removable storage bins for easy cleaning and reconfiguration. Consider adding blackout curtains for better sleep during daylight hours and a portable air conditioner for summer trips.
Each approach requires evaluating your usage patterns—prioritize features that align with your primary goals, and keep materials easy to source and install. Start small, test setups, and adjust as needed.

Leave a Reply