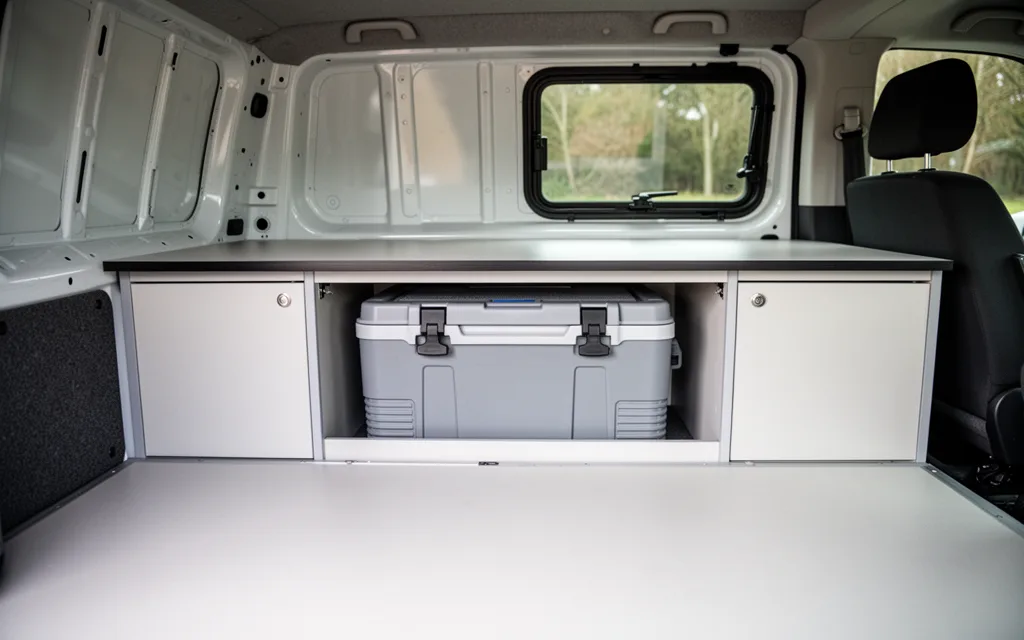
For van lifers and outdoor enthusiasts, a reliable camper van cool box is essential for keeping meals fresh and drinks chilled during long adventures. Whether you’re hiking through remote trails or parking at a campsite, optimizing your cool box setup can transform your van into a comfortable, self-sufficient base. Consider insulation, organization, and power sources—like solar panels or portable coolers—to maximize efficiency. Think beyond storage: integrate smart cooling systems, use temperature-controlled compartments, and choose lightweight, durable materials. These ideas not only preserve perishables but also enhance your overall van lifestyle, ensuring every journey stays enjoyable, no matter the weather.
What Is a Camper Van Cool Box and Why It Matters
A camper van cool box is a specialized insulated container designed to keep food, drinks, and medications at safe temperatures during travel. Unlike standard coolers, these units are built for durability, often featuring reinforced materials, secure latches, and sometimes even dry ice compartments or electric cooling systems. For van lifers, they’re a non-negotiable tool for preserving perishables in unpredictable environments—whether you’re traversing desert heat, mountain cold, or remote backcountry trails.
Food safety is the primary concern. Without proper cooling, perishable items like dairy, meat, and prepped meals can spoil within hours, risking foodborne illness. A reliable cool box maintains temperatures below 5°C (41°F), preventing bacterial growth and ensuring meals remain safe to eat. This is critical when access to refrigeration is limited, as is common during extended trips or off-grid adventures.
Comfort also hinges on these devices. Keeping drinks cold and snacks fresh enhances the van-living experience, especially during long drives or multi-day excursions. A well-stocked cool box reduces reliance on gas stations or campsites for last-minute purchases, saving time and money while minimizing environmental impact.
- Prevents food spoilage in extreme temperatures
- Reduces health risks from improper food storage
- Enhances travel comfort with consistent cold storage
- Supports sustainable, self-sufficient van life
Top 5 Camper Van Cool Box Types for Van Lifers
Choosing the right cool box depends on your van’s layout, power setup, and lifestyle. Here are five tailored options:
- Portable Soft-Sided Coolers (e.g., Yeti Tundra 450): Lightweight, insulated for 5–7 days, and ideal for short trips. Use dry ice for extended cold retention without power.
- Built-In Frost-Free Units (e.g., Dometic CFX3): Install in your van’s fridge compartment for 24/7 cooling. Energy-efficient and compatible with 12V systems; perfect for full-time van lifers.
- Solar-Powered Coolers (e.g., EcoCooler Solar 50L): Use solar panels to power thermoelectric cooling. Best for off-grid stays but limited by ambient temperatures (optimal below 30°C).
- Insulated Hard-Sided Coolers (e.g., Coleman PowerCenter 50): Durable, lockable, and compatible with power inverters. Great for group trips or storing perishables in hot climates.
- Combination Coolers (e.g., Norcold N12): Hybrid units with both fridge/freezer compartments. Require 120V hookups but offer flexibility for seasonal use (e.g., winter camping).
Consider your power source (solar, propane, or 120V) and storage needs. For example, soft-sided coolers save space but require frequent refilling, while built-in units demand upfront installation costs. Always test cooling performance in your van’s specific environment—heat from the sun can reduce efficiency by 20–30%.
How to Choose the Right Cool Box for Your Van
When selecting a cool box for van life, prioritize practicality over aesthetics. Start by measuring your van’s storage space and estimating your daily cooling needs—how many people will use it, and for how long? A 40L unit might suffice for solo trips, but groups or extended stays demand larger capacity. Overestimating space ensures you avoid mid-trip compromises.
- Insulation quality: Opt for boxes with thick polyurethane foam insulation (at least 5cm) for 24+ hours of cooling. Test lids for airtight seals; even minor gaps let heat in.
- Power source: 12V DC cool boxes integrate seamlessly with van batteries, while AC models require access to shore power. Solar-powered options are ideal for eco-conscious travelers but may add bulk.
- Durability: Choose boxes with stainless steel exteriors or heavy-duty plastic for resistance to rust, UV damage, and impacts. Look for waterproof ratings (IP65+) and reinforced corners.
- Layout integration: Consider cool boxes with external controls or angled interiors for easy access. For seamless storage, cool van conversion ideas often include built-in compartments that double as cool boxes.
Finally, test the box in extreme temperatures—both hot and cold—to ensure it performs under real-world conditions. A well-chosen cool box isn’t just about keeping drinks cold; it’s about maintaining food safety and reducing waste during long trips.
DIY Cool Box Installation Tips for Van Conversions
Mounting a cool box in a van conversion requires balancing accessibility, stability, and electrical efficiency. Start by securing the unit using heavy-duty brackets or custom cabinets to prevent movement during travel. If installing a 12V fridge, ensure it’s mounted on a level surface to avoid vibration damage. For space optimization, consider vertical mounting behind a fold-out panel or beneath a countertop—this keeps the cool box out of the way while maintaining easy access. Always leave at least 5cm of clearance around the unit for airflow, which improves cooling efficiency and reduces condensation issues.
- Wiring: Connect the cool box to your van’s electrical system via a dedicated 12V circuit. Use a fuse rated for the fridge’s power draw (typically 10–20A) to prevent overloads. If using a DC-to-AC inverter for a standard fridge, ensure your battery bank can handle the additional load.
- Insulation: Wrap the cool box’s exterior with foam insulation or install a heat-reflective barrier to minimize heat transfer from the van’s interior. Seal gaps with silicone to prevent warm air from entering.
- Space hacks: Use modular storage solutions, like drawer dividers or stackable containers, inside the cool box to maximize organization. For dual cool boxes, position one near the kitchen area and the other in a lower compartment for frozen items.
For advanced storage ideas, see our guide Camper Van Cooler Box Ideas for Cool Storage, which covers compartmentalization and temperature zoning. Always test your setup during a short trip before long-term use to identify any electrical or cooling inefficiencies.
Maximizing Cool Box Efficiency on the Road
Van lifers often face the challenge of keeping cool boxes functional during long trips without access to power or shade. Prioritize insulation by using thick foam or vacuum-insulated coolers, and pre-chill contents before packing. Avoid overfilling to allow airflow, which reduces condensation and maintains even cooling. For ice efficiency, opt for block ice over cubes—it melts slower and keeps items colder longer. Store ice in sealed containers to prevent water pooling, which insulates the cooler and reduces cooling capacity. Drain melted water regularly to avoid insulating the box and to reuse it for watering plants or cleaning. When using electric coolers, pair them with solar panels or a high-capacity inverter to manage power consumption. Limit usage to essential items and set thermostats to the lowest necessary temperature to conserve energy. If relying on passive cooling, position the cooler in the van’s coolest spot (e.g., under a bench) and cover it with a reflective thermal blanket to block heat. For extended trips, consider dual coolers: one for perishables and another for non-perishables, reducing the need to open the main box frequently. Finally, monitor temperatures with a thermometer and adjust ice or power settings as needed—this prevents overuse of resources and ensures food safety. These steps balance practicality with sustainability, ensuring your cool box lasts through the longest journeys.
- Use block ice in sealed containers to minimize melting and water accumulation.
- Position coolers in shaded, insulated areas of the van to reduce heat absorption.
- Pair electric coolers with solar power systems to avoid draining battery reserves.
- Refrain from opening the cooler unnecessarily to maintain internal temperature stability.
- Monitor temperature regularly and adjust ice or power settings based on ambient conditions.
Leave a Reply