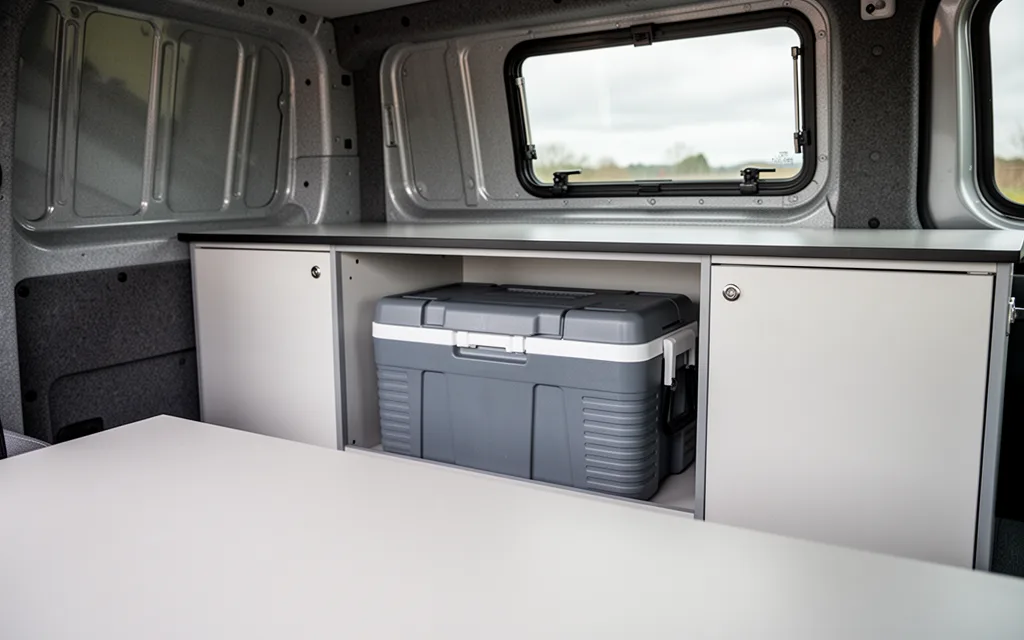
Keeping your drinks, food, and essentials chilled during long camping trips can be a challenge, especially in a cramped camper van. A well-designed camper van cooler box isn’t just about holding ice—it’s about smart storage that maximizes space and efficiency. Whether you’re hiking remote trails or parking at a campsite, the right cooler box can keep perishables fresh, reduce weight, and even double as a storage compartment. Consider insulation, placement near vents, and lightweight materials to avoid overheating. Think beyond the basics: modular dividers, stackable trays, and even solar-powered cooling systems can transform your cooler box into a versatile, temperature-controlled hub. The goal? Stay cool, stay organized, and keep your van’s interior from turning into a sauna.
Top 5 Camper Van Cooler Box Types for Different Needs
Choosing the right cooler box depends on your van’s layout, power access, and storage demands. Here are five tailored options to suit specific scenarios:
- Portable Soft-Sided Coolers: Ideal for short trips or flexible storage, these lightweight coolers (e.g., 40–60L) are easy to move but offer less insulation. Prioritize models with thick foam walls and drain plugs for easy cleaning.
- Hard-Sided Insulated Coolers: Built for durability, these 80–120L units (e.g., Yeti or Coleman) use vacuum-sealed insulation to keep food cold for 72+ hours. Perfect for multi-day trips but bulkier than soft-sided options.
- Under-Bench Built-In Coolers: Space-saving solutions installed beneath seating or beds. Look for models with 12V DC power inputs and dry ice compatibility for extended cooling. Requires permanent installation but frees up cabin space.
- Overhead Coolers with Power Ports: Mounted above beds or in ceilings, these 50–80L units often include USB ports or 120V outlets for charging devices. Best for van conversions with electrical systems already in place.
- Hybrid Solar-Powered Coolers: Combines portability with off-grid capability. Units like the Dometic CFX200 use solar panels or 12V power to maintain temperatures for days. Ideal for remote camping but heavier and pricier than standard coolers.
DIY Installation Tips for Camper Van Cooler Boxes
Mounting a cooler box in a camper van requires balancing stability, insulation, and airflow. Start by selecting a location with minimal exposure to direct sunlight and vibration, such as under a bench or in a closet. Use a level to ensure the cooler sits evenly, then apply 2-inch thick foam insulation around the mounting area to prevent cold bridging and reduce condensation. Secure the cooler with heavy-duty brackets or screws, avoiding direct contact with the van’s frame to minimize heat transfer.
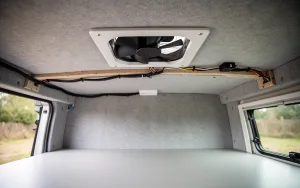
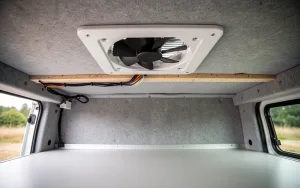
- Install ventilation: Drill small holes near the top of the cooler box for airflow, or mount a low-profile fan (e.g., 12V fan) to prevent moisture buildup. Ensure vents are covered with mesh to keep pests out.
- Insulate the cooler: Wrap the exterior of the box in closed-cell foam panels or apply spray foam to seal gaps. This reduces heat infiltration and keeps contents colder longer.
- Secure with redundancy: Use bungee cords or adjustable straps to anchor the cooler to the van’s structure, especially for off-road travel. Avoid over-tightening, which could damage the box.
- Test and adjust: After installation, monitor the cooler’s temperature during a short trip. If condensation forms, add more insulation or improve airflow.
Proper insulation and ventilation not only extend the cooler’s lifespan but also reduce energy use if paired with a power source. Always prioritize accessibility for refilling and maintenance.
Smart Storage Solutions for Camper Van Cooler Boxes
Maximizing space around your cooler box is essential for efficient campervan living. Start by utilizing under-bed storage: install shallow drawers or modular bins beneath your sleeping area to hold non-perishables like dry goods, utensils, or cleaning supplies. Opt for waterproof, stackable containers to prevent moisture damage and ensure easy access. For cooler boxes with limited vertical space, consider wall-mounted configurations. Mount a narrow shelf or hanging organizer above the cooler to store condiments, snacks, or small appliances. If your van’s ceiling height allows, install overhead racks or a retractable net system to hold heavier items like canned goods or insulated bins. Another trick is to use the area behind the cooler—store towels, clothing, or camping gear in a collapsible tote that slides into the space. For cooler boxes with built-in compartments, use dividers to separate frozen and refrigerated items, preventing cross-contamination. When planning storage layouts, reference our cool van conversion ideas guide for inspiration on balancing functionality with space constraints. Prioritize lightweight, stackable solutions and avoid overloading areas that could compromise stability during travel. By tailoring storage to your cooler’s dimensions and your lifestyle, you’ll create a clutter-free, organized system that simplifies meal prep and keeps essentials within reach.
Energy-Efficient Cooling Strategies for Camper Van Coolers
Optimizing your camper van cooler’s efficiency starts with smart power and insulation choices. Solar power is a game-changer: install a 100W–200W solar panel paired with a lithium battery to run your cooler without draining your main power source. Use a solar charge controller to prevent overcharging, and consider portable solar coolers for smaller items. For cooling, thermoelectric (Peltier) coolers are ideal—they use 30–50% less power than compressors and work well in moderate climates. Pair them with a small fan to improve airflow and avoid overheating. However, they struggle in extreme heat, so use them in shaded areas or during cooler parts of the day.
- Insulate aggressively: Line your cooler box with polyurethane foam or vacuum insulation panels. Seal gaps with weatherstripping, and add a thermal blanket inside the van’s storage area to block heat.
- Use reflective materials: Apply reflective foil to your van’s roof and walls to reduce interior temperatures by up to 20°F (11°C).
- Optimize placement: Store your cooler in a shaded, well-ventilated spot, and avoid leaving it in direct sunlight for extended periods.
- Combine strategies: Use a thermoelectric cooler with solar power during the day, then switch to a passive insulated box at night. For more ideas on cool box setups, check out camper van cool box ideas for van lifers.
These methods reduce energy use while keeping your food and drinks safe, even in hot conditions.
Camper Van Cooler Box Maintenance and Longevity Hacks
Keep your cooler box functional in harsh conditions by prioritizing thorough cleaning, protective measures, and smart storage. After each use, scrub interiors with a mild soap and water solution, avoiding harsh chemicals that degrade insulation or liners. Rinse thoroughly and dry with a microfiber cloth to prevent mold growth in damp van environments. For stubborn odors, use a 50/50 mix of water and white vinegar, then wipe with a paper towel—no abrasive sponges, which can scratch surfaces.
- UV protection: Store coolers in shaded areas or use UV-resistant covers during prolonged sun exposure to prevent plastic degradation and fading.
- Temperature control: Insulate coolers with foam padding or thermal blankets if your van lacks climate control, reducing strain on the box during extreme heat or cold.
- Seal integrity: Check for cracks or leaks monthly. Apply a food-safe silicone sealant to minor gaps, and replace damaged lids promptly to maintain efficiency.
- Airflow management: Avoid overpacking; leave space for cold air circulation. Use ice packs strategically, placing them in corners rather than stacking directly on food to prevent freezing.
- Drainage: If your cooler sits on a van floor, elevate it slightly with rubber mats to prevent moisture accumulation and corrosion from condensation.
Regular maintenance—like quarterly deep cleans and annual inspections—can extend a cooler’s lifespan by 50% or more, ensuring reliability on long trips or during van conversions.
Leave a Reply